10 May 2013
If you run a blogger acccount or run a www.myname.blogspot.com and interested in having your own custom domain i.e www.myname.com.
This post shows how to host your own domain name on Blogger using crea8host.com as your domain registrar.
Mainly you have to follow 4 major steps, they are:
- Adding custom domain on Blogger
- Getting your domain ownership verification token
- Change DNS (Domain Name System) settings
- Verifying Domain name ownership on Blogger
If you don’t have a Blogger account first you have to create it, if you have a Google account you already have a Blogger account, so just log-in to Blogger.
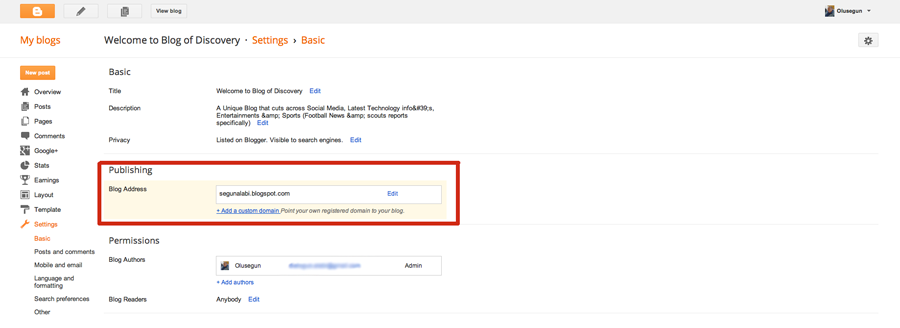
Step 1: Adding custom domain on Blogger
- Go to http://www.blogger.com/.
- Now if you already have a blog, select which blog should use the new custom domain name.
- Go to your selected blog’s “Settings > Basic”.
- Under the “Publishing”, click “Add custom domain”.
- Now in the “Advanced settings” type your new domain name URL.
- Click “Save” button. Then blogger display this error “We have not been able to verify your authority to this domain. Error 32. Please follow the settings instructions.”
- Click “settings instructions”. If you click this link before that error (above), you can’t configure CNAME correctly.
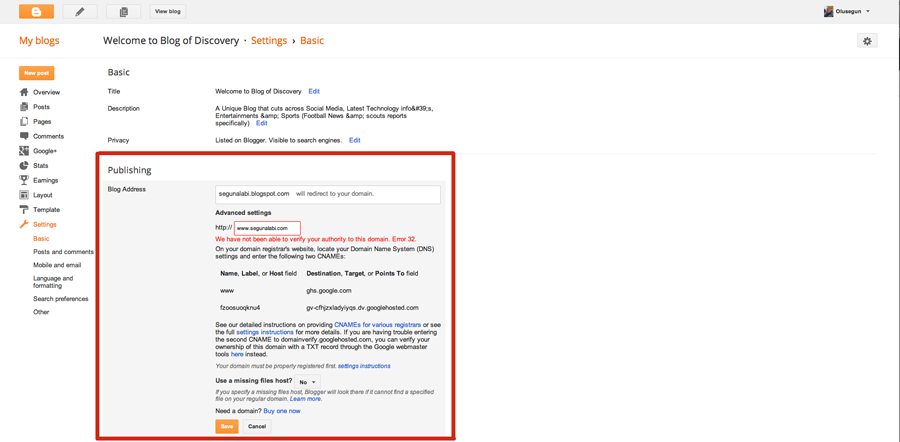
Step 2: Getting your domain ownership verification token
- Pay attention to a pair of two codes highlighted in the screenshot. Those are your domain ownership token. Your token will be different.
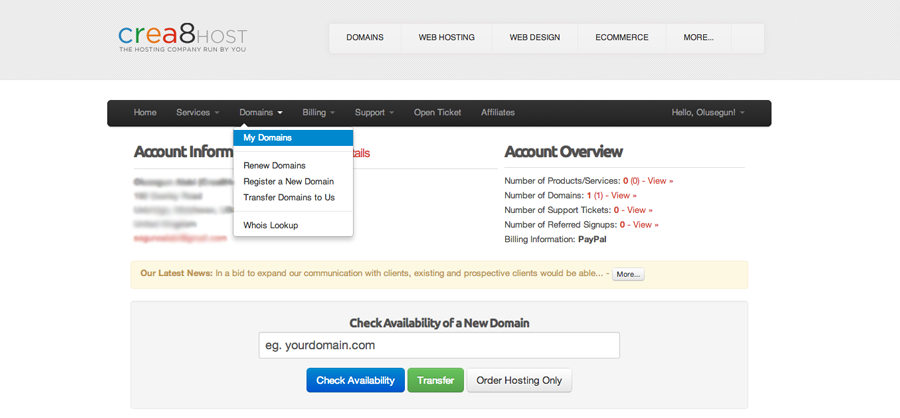
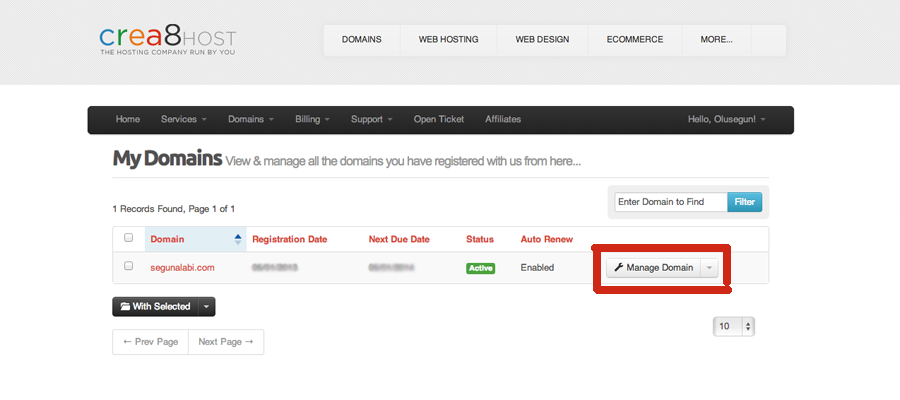
- Login to your Crea8Host Account and Choose Domains >> My Domain>>Manage Domains. (As shown below)
Step 3: Change DNS settings
- Go to your domain name registrar’s “DNS console” panel and log-in.

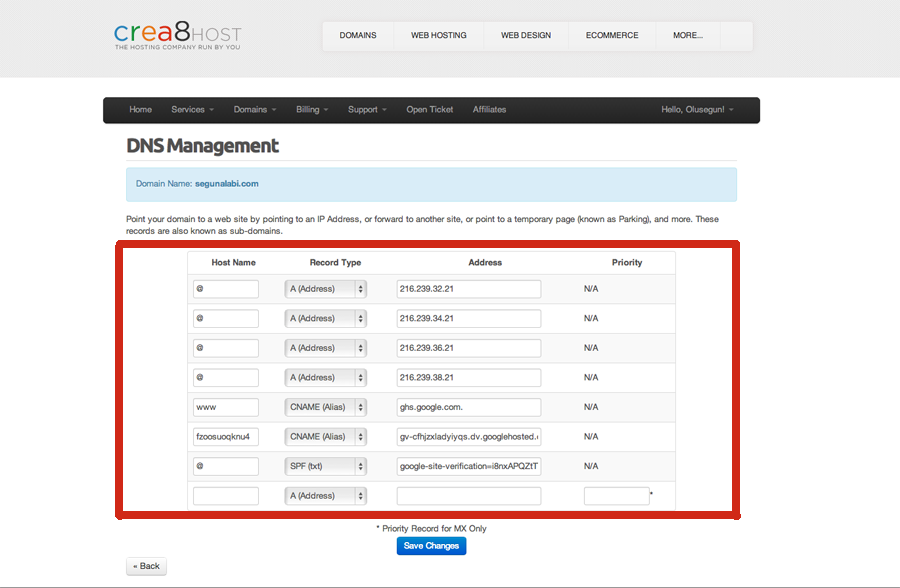
- Add a CNAME.
- For Host Name/Name/Label or Host” field, enter “www” without quotes and
- For Address/Destination/Target or Points To field, enter “ghs.google.com” without the quotes.
- Now add another CNAME. This is for domain ownership verification.
- In the Host Name field, paste the first code
- In the Destination field, paste the second code
(Use your own codes generated)
- Now we should add “A-records”. If you already have “A-records”, modify them. If not, click “Add” button.
- You have to add 4 separate “A-records”, pointing to the following Google IP addresses:
- 216.239.32.21
- 216.239.34.21
- 216.239.36.21
- 216.239.38.21
- Enter each IP into an “Address” field. In the corresponding “Host Name” field, enter your domain’s naked URL (without “www”, e.g example.com).
- Finally click “Save” button and wait for a few minutes to update all your domain settings.
Step 4: Update your Blogger settings
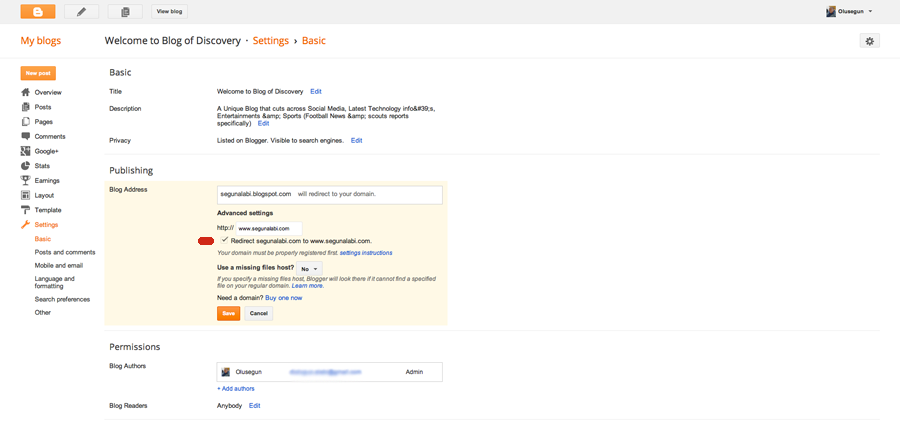
- Now go back to “Settings > Basic > Publishing” on Blogger and again enter your custom domain name with “www”.
- Tick “redirect” option.
- Finally click “Save” button. If it again displays “Unable to verify authority…” error, wait for a few hours to update your DNS settings and again add your domain name. No need to follow Host Records modifications. Just add domain name to Blogger publishing section.
- That’s it, now your blog has a custom domain name.